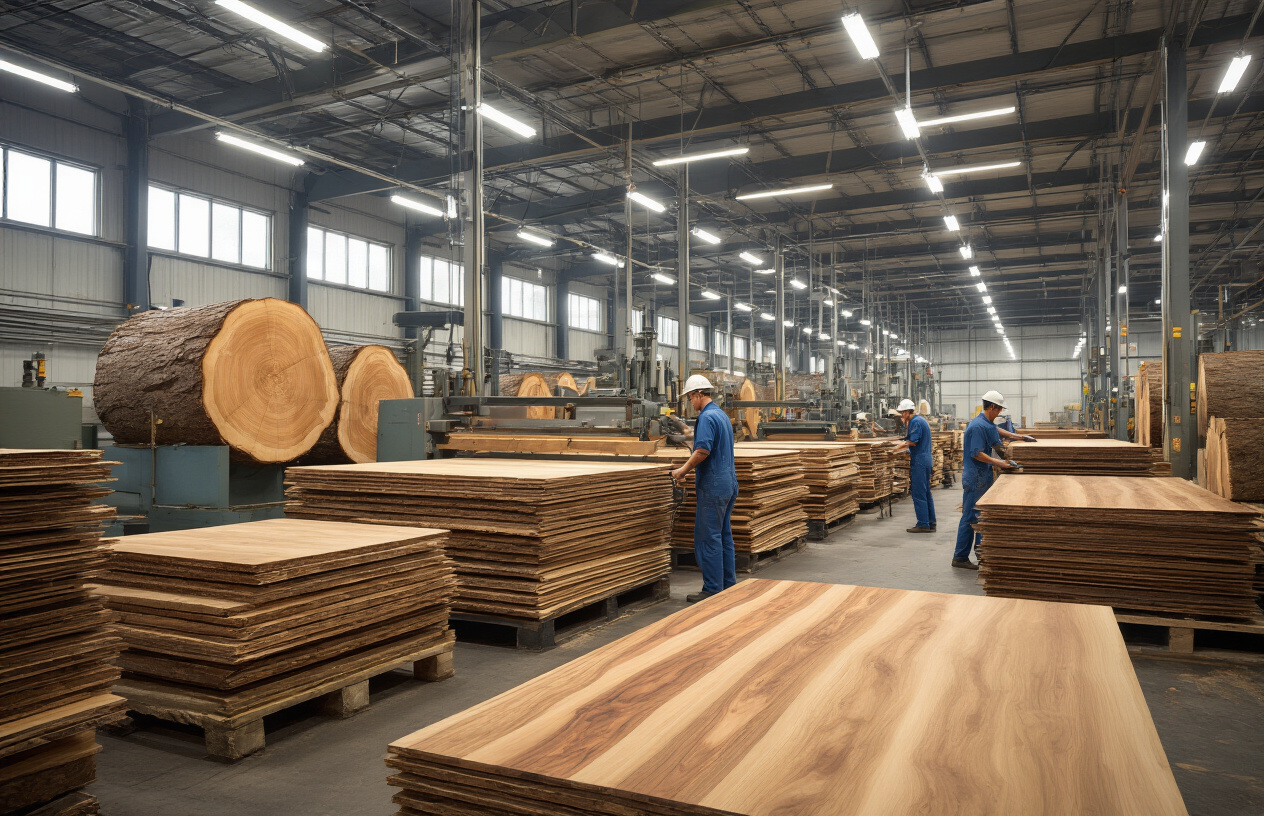
Ever wondered how those beautiful wood surfaces in furniture are made? Natural veneer transforms raw timber into the thin, elegant wood sheets that craftspeople, woodworkers, and furniture manufacturers use daily. This guide walks you through the journey of veneer production, from selecting the perfect trees in forests to creating finished panels ready for your next project. You’ll discover the careful harvesting methods that preserve wood quality, learn how logs become paper-thin veneer sheets, and understand the critical drying and conditioning processes that ensure stability in the final product.
Selecting and Harvesting the Right Trees

A. Identifying Premium Wood Species for Veneer Production
Not all trees make the cut for veneer production. The superstars of the veneer world? Oak, maple, cherry, walnut, and mahogany. These aren’t just random picks – they’re prized for their distinctive grain patterns, natural coloration, and structural stability.
What makes a wood species “premium” anyway? It’s all about character. The most sought-after species display unique figuring like bird’s eye, burl, or quilted patterns that can’t be replicated in manufactured products. These natural features transform ordinary furniture into conversation pieces.
Think of veneer like nature’s artwork – the more interesting the canvas, the more valuable the final piece.
B. Sustainable Forestry Practices in Veneer Manufacturing
The days of reckless logging are (thankfully) behind us. Modern veneer production embraces sustainability as both an ethical obligation and a business necessity.
Leading manufacturers now work with certified forests where tree harvesting follows strict replacement protocols. For every tree cut, multiple saplings take its place. This isn’t just good PR – it’s good business. Without sustainable practices, the entire industry would eventually cut itself out of existence.
Many producers have adopted selective harvesting methods, taking only mature trees while leaving younger ones to continue growing. This maintains forest biodiversity and ensures continuous production for decades to come.
C. Seasonal Considerations for Optimal Harvesting
Timing is everything in veneer harvesting. Winter months generally reign supreme for harvesting most hardwoods. Why? The sap content drops significantly during dormant periods, which means less moisture to deal with during processing.
The ground matters too. Frozen soil in winter minimizes harvesting damage and reduces the environmental impact of heavy machinery. This seasonal approach isn’t just tradition – it directly impacts veneer quality.
Each species has its ideal harvesting window:
| Wood Species | Optimal Harvesting Season | Reason |
|---|---|---|
| Oak | Winter | Lower moisture content |
| Maple | Late winter | Less sap flow |
| Walnut | Early winter | Reduced risk of staining |
| Cherry | Deep winter | Better color development |
D. Initial Log Selection and Quality Assessment
This is where the expert’s eye comes in. Not every log from a premium species makes the cut.
Veneer logs undergo rigorous inspection before they even leave the forest. Scouts look for straight trunks with minimal taper, few branches, and no visible defects. The ideal veneer log? Straight as an arrow with clear sections at least 8 feet long.
Diameter matters enormously. While standard lumber can be produced from relatively small logs, premium veneer typically requires diameters exceeding 16 inches. The bigger the log, the more consistent the grain pattern across multiple sheets.
Defects that might be acceptable in construction lumber – like small knots or slight color variations – can disqualify an otherwise promising veneer candidate. The standards are that high because the final product demands visual perfection.
Log Preparation and Storage

A. Debarking and Cleaning Processes
The journey from log to veneer starts with thorough cleaning. Think about it – those trees spent decades in forests collecting dirt, moss, and all sorts of debris. We can’t just slice them up as is!
First, the logs go through industrial debarkers that strip away the outer bark layer. These machines use rotating arms with blades or high-pressure water jets that peel away the bark while preserving the valuable wood underneath. Pretty cool tech, right?
After debarking, the logs need serious cleaning. Any remaining debris could damage cutting equipment or create imperfections in the final veneer. Workers use pressure washers to blast away stubborn dirt and sometimes apply cleaning solutions for particularly grimy logs.
B. Proper Log Storage Techniques to Prevent Defects
Storing logs properly is make-or-break for veneer quality. The wrong storage can turn premium timber into expensive firewood within weeks.
Water storage is the gold standard for long-term preservation. Submerging logs in ponds or spraying them constantly prevents splitting and keeps bugs away. The moisture maintains the wood’s natural flexibility – crucial for slicing thin veneers later.
For dry storage, it’s all about protection from the elements. The logs need to be:
- Elevated off the ground on supports
- Covered to prevent direct sunlight exposure
- Arranged to allow air circulation
- Regularly checked for early signs of defects
C. Initial Cutting and Sizing for Processing
Before the actual veneer slicing begins, logs need to be cut to manageable sizes. This typically means cross-cutting those massive tree trunks into sections called “bolts” or “flitches” that match standard veneer lengths (usually 8-10 feet).
The orientation of these cuts isn’t random. Skilled workers examine each log to determine the optimal cutting pattern based on:
- Visible grain patterns
- Location of knots and defects
- Desired figure in the final veneer
Once sized, the sections undergo a “conditioning” process – typically steaming or soaking in hot water. This softens the wood fibers, making them more pliable for the slicing process ahead. Without this step, you’d end up with cracked, brittle veneer sheets instead of those beautiful, flexible ones.
Transforming Logs into Veneer Sheets

A. Different Cutting Methods: Rotary, Sliced, and Sawn
Ever wondered how those perfect wood sheets get made? It all comes down to three main cutting techniques:
Rotary Cutting is like unrolling a paper towel roll. The log spins against a blade, creating one continuous sheet. This method gives you those dramatic, bold grain patterns you see in plywood faces. Super efficient but sometimes less elegant.
Slice Cutting works more like a deli meat slicer. The log moves across a stationary knife in various orientations. This creates those gorgeous cathedral patterns and figure effects that high-end furniture makers go crazy for.
Sawn Veneer is the old-school approach – basically sawing thin sheets off the log. It’s slower and wastes more wood, but delivers the most stable veneers with grain patterns closest to solid lumber.
| Method | Grain Pattern | Yield | Common Uses |
|---|---|---|---|
| Rotary | Bold, dramatic | Highest | Plywood, commercial panels |
| Sliced | Elegant, figured | Medium | Fine furniture, architectural panels |
| Sawn | Natural, lumber-like | Lowest | Premium furniture, musical instruments |
B. Machine Technology Behind Precision Veneer Cutting
The machines that slice veneer are engineering marvels. Modern veneer cutting systems use computer-controlled hydraulics that position logs with mind-blowing precision – we’re talking accuracy within 0.1mm.
High-carbon steel knives sharper than your best kitchen knife do the actual cutting. These blades need constant maintenance – sharpening every few hours during production to maintain that perfect edge.
For rotary cutting, massive lathes hold logs up to 12 feet long between chucks that rotate at precisely controlled speeds. As the log spins, a knife carriage advances at exactly the right rate to maintain the target thickness.
Slicing machines use different configurations:
- Flat slicers for straight cuts
- Half-round slicers for curved cuts
- Quarter slicers for those gorgeous radial patterns
The newest machines incorporate laser guidance systems that map the log’s shape before cutting begins, calculating the optimal cutting path to maximize yield and quality.
C. Thickness Control and Consistency Standards
Veneer thickness isn’t just about preference – it’s about function. Most decorative veneers come in at 0.5mm to 0.6mm (1/42″ to 1/40″), which hits the sweet spot between flexibility and stability.
Getting consistent thickness throughout a sheet is where the real challenge comes in. Variations in wood density, moisture content, and grain direction all conspire against uniformity.
Modern mills use thickness gauges that constantly monitor the veneer as it’s being cut. Any deviation triggers micro-adjustments to the knife position. The industry standard tolerance is typically ±0.05mm – about the thickness of a human hair.
Quality control teams sample sheets regularly using precision micrometers. This data gets fed back to the machine operators who make adjustments as needed.
Too thick? You waste wood and create stiff sheets. Too thin? You get fragile veneer prone to cracking. Finding that perfect middle ground is where the artistry meets the science.
D. Managing Wood Grain Patterns for Aesthetic Appeal
The grain pattern is where veneer becomes art. Master veneer cutters don’t just cut wood – they reveal its character.
The orientation of the log to the knife dramatically affects the resulting pattern:
- Plain-sliced (flat-cut) creates those cathedral arches
- Quarter-sliced produces straight, consistent grain lines
- Rift-cut minimizes flake in oak and similar species
Good veneer producers keep track of every sheet’s position in the log, numbering them sequentially. This allows for “sequence matching” where adjacent sheets retain their natural relationship, creating stunning continuous patterns across furniture or paneling.
For burls, crotches, and figured woods, the cutter’s experience becomes critical. They’ll study a log for hours before making the first cut, looking for the tell-tale signs of what beauty might lie hidden inside.
The cutting speed also affects grain appearance. Slower cuts generally produce smoother surfaces that highlight the grain better than rushed production.
E. Handling Special Wood Characteristics During Cutting
Not all wood behaves the same under the knife. Some species throw tantrums during cutting while others cooperate beautifully.
Those gorgeous burls that fetch premium prices? Total nightmares to cut. Their swirling, irregular grain wants to tear rather than slice cleanly. Cutters often slow machines to a crawl and adjust knife angles to baby these temperamental treasures.
Interlocked grain in woods like sapele or mahogany requires constant blade adjustments to prevent tearing. Sometimes the knife angle needs to change several times within a single log.
Knots present another challenge. A good operator can spot them coming and adjust the pressure or temporarily lift the knife to avoid catastrophic tearing.
Highly figured maple and similar woods with changing density need special handling too. What works for straight grain fails miserably when you hit a quilted or bird’s-eye section.
The moisture content is critical – too dry and the wood crumbles, too wet and it compresses rather than cuts. The sweet spot usually falls between 15-25% moisture depending on species.
Drying and Conditioning Processes

Initial Moisture Reduction Techniques
Fresh veneer sheets come off the slicer dripping wet – we’re talking 50-80% moisture content. That’s basically a wood sponge. Getting this moisture down fast is critical.
Most mills start with pre-drying methods that gently remove surface moisture. Jet dryers blow room-temperature air across veneer sheets in a continuous process. This quick first pass drops moisture levels to around 40% without shocking the wood.
Some operations stack veneers with stickers (thin wood spacers) between them, allowing natural air circulation for a few days. Old-school but effective.
The real game-changer? Vacuum pre-drying. This pulls moisture out evenly by creating negative pressure that literally sucks water from the core. Takes just hours instead of days.
Kiln Drying Technology and Temperature Control
Kiln drying is where the magic happens. Modern veneer kilns are precision machines, not just hot boxes.
Temperature matters enormously. Too hot? Your veneer warps, cracks or discolors. Too cool? You’re wasting time and energy.
Most hardwood veneers need a gradual temperature progression:
- Starting phase: 120-140°F
- Mid-drying phase: 140-160°F
- Final phase: 160-180°F
The best kilns use computerized controls that adjust humidity and temperature every few minutes based on moisture sensors embedded in sample veneer sheets. This prevents case-hardening, where the outside dries faster than the inside.
Roller dryers keep sheets flat while moving them through increasingly warm zones. Multi-zone progressive kilns can process different species simultaneously by varying conditions in each section.
Achieving Optimal Moisture Content for Stability
The target moisture content isn’t just “dry” – it’s strategically balanced. For most applications, 8-12% is the sweet spot.
Go drier than 8% and your veneer becomes brittle, prone to splitting when handled. Stay above 12% and you’re asking for trouble with adhesion and warping after application.
Conditioning chambers are the final step in moisture control. After kiln drying, veneers rest in a controlled environment where temperature and humidity stabilize the sheets. This equalizes moisture throughout the veneer’s thickness.
The best mills use moisture meters at multiple checkpoints. They test core moisture, not just surface readings, using electrical resistance or capacitance meters.
Stacking and weighting during the conditioning phase helps keep sheets flat. Most operations allow 24-48 hours of conditioning before sending veneers to matching or panel production.
Veneer Sheet Processing
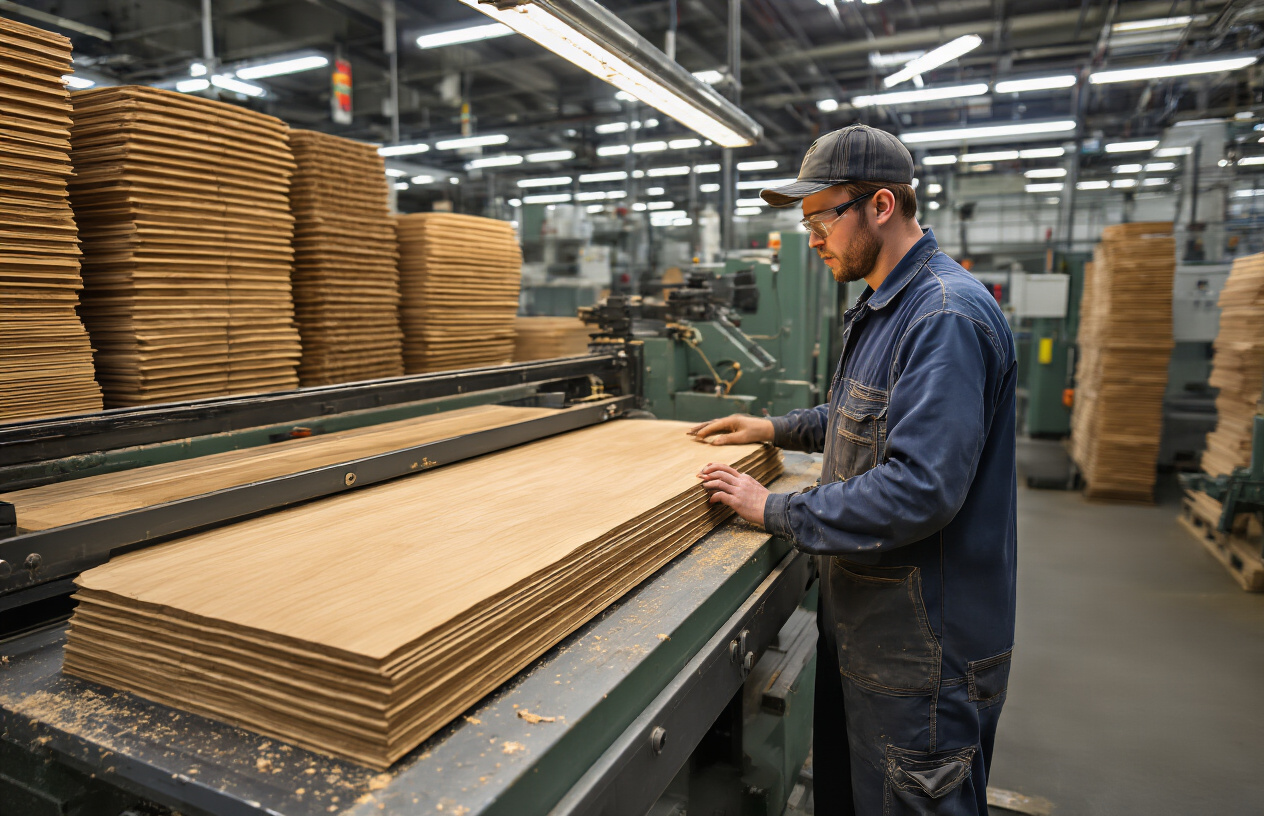
Clipping and Trimming for Dimensional Accuracy
Once veneer sheets emerge from the slicing or peeling process, they’re still rough around the edges—literally. This is where clipping and trimming come into play.
High-precision guillotine clippers slice through the veneer sheets with incredible accuracy, creating clean, straight edges. These aren’t your office paper cutters—they’re industrial-grade machines designed specifically for wood veneer.
The goal? Getting those sheets to exact dimensions for their final application. A few millimeters off and you’ve got a useless piece that won’t match up when creating sequence-matched panels.
Modern veneer facilities use computer-controlled systems that optimize each cut, minimizing waste while maximizing yield. It’s like a high-stakes game of Tetris, except with valuable wood.
Grading Systems for Quality Control
Ever wonder why some veneer costs an arm and a leg while others are surprisingly affordable? It all comes down to grading.
Each veneer sheet gets scrutinized by expert graders who categorize them based on:
- Color consistency
- Figure patterns
- Size and number of defects
- Overall appearance
Most manufacturers follow standardized grading systems like those established by the Hardwood Plywood & Veneer Association (HPVA), which typically include:
| Grade | Characteristics | Typical Use |
|---|---|---|
| AA | Nearly flawless, consistent color | Luxury furniture, yacht interiors |
| A | Minor flaws, good color match | High-end cabinetry, architectural panels |
| B | Some color variation, small defects allowed | Commercial furniture, wall panels |
| C/D | Significant defects, color variations | Utility applications, substrate layers |
Repairing and Patching Imperfections
Nobody’s perfect—not even premium veneer sheets. But that doesn’t mean they’re destined for the scrap heap.
Skilled craftspeople perform minor miracles by repairing veneer defects. They carefully cut out knots, splits, and other blemishes, then patch the areas with matching veneer pieces. It’s surgical precision meets woodworking.
For smaller imperfections, they use:
- Veneer tape for splits and cracks
- Veneer plugs for knot holes
- Wood fillers for minor surface issues
The best repairs are virtually invisible in the finished product. And I’m not exaggerating—you could stare at a repaired premium veneer panel and never spot the fix.
Creating Sequence-Matched Sets for Consistency
This is where veneer manufacturing becomes an art form.
After grading and repairing, sheets from the same log are arranged in sequence—just as they were cut from the tree. This creates those gorgeous continuous grain patterns you see in high-end furniture and architectural installations.
The techniques include:
- Book matching (adjacent sheets flipped like pages in a book)
- Slip matching (sheets placed side by side in sequence)
- Quarter matching (four sheets arranged in a diamond pattern)
Technicians number each sheet and keep them in perfect order throughout the remaining manufacturing process. One sheet out of sequence? The entire set could be ruined.
The results speak for themselves. When you see wood grain that flows seamlessly across an entire wall or wraps perfectly around a curved surface, you’re looking at the magic of sequence-matched veneer sets.
Panel Assembly and Bonding
Substrate Selection and Preparation
The foundation of a great veneer panel starts with choosing the right substrate. Think plywood, MDF, or particleboard – each brings something different to the table.
Plywood gives you strength and stability, making it perfect for structural applications. MDF offers that smooth, flat surface that’s a dream for thin veneers. Particleboard? It’s the budget-friendly option that still gets the job done.
Before bonding, we need to prep these substrates properly. First step is sanding them to create that slightly rough surface the adhesive can really grab onto. Then comes the cleaning – dust and oils are the enemy of a good bond.
Moisture content is non-negotiable – it needs to match the veneer’s (usually 6-12%). Too dry or too wet, and you’re asking for warping down the road.
Adhesive Technologies for Different Applications
Picking the right glue can make or break your veneer project. No pressure!
PVA (polyvinyl acetate) is your go-to for interior furniture. It’s water-based, easy to work with, and creates a strong bond without breaking the bank.
Urea-formaldehyde really shines for commercial panels. It creates a moisture-resistant bond and cures quickly in hot presses.
For kitchens, bathrooms, or outdoor applications? You’ll want phenol-formaldehyde or resorcinol adhesives. These create waterproof bonds that laugh in the face of humidity.
And for those eco-conscious projects, soy-based and other bio-adhesives are making waves. They offer reduced VOCs without sacrificing quality.
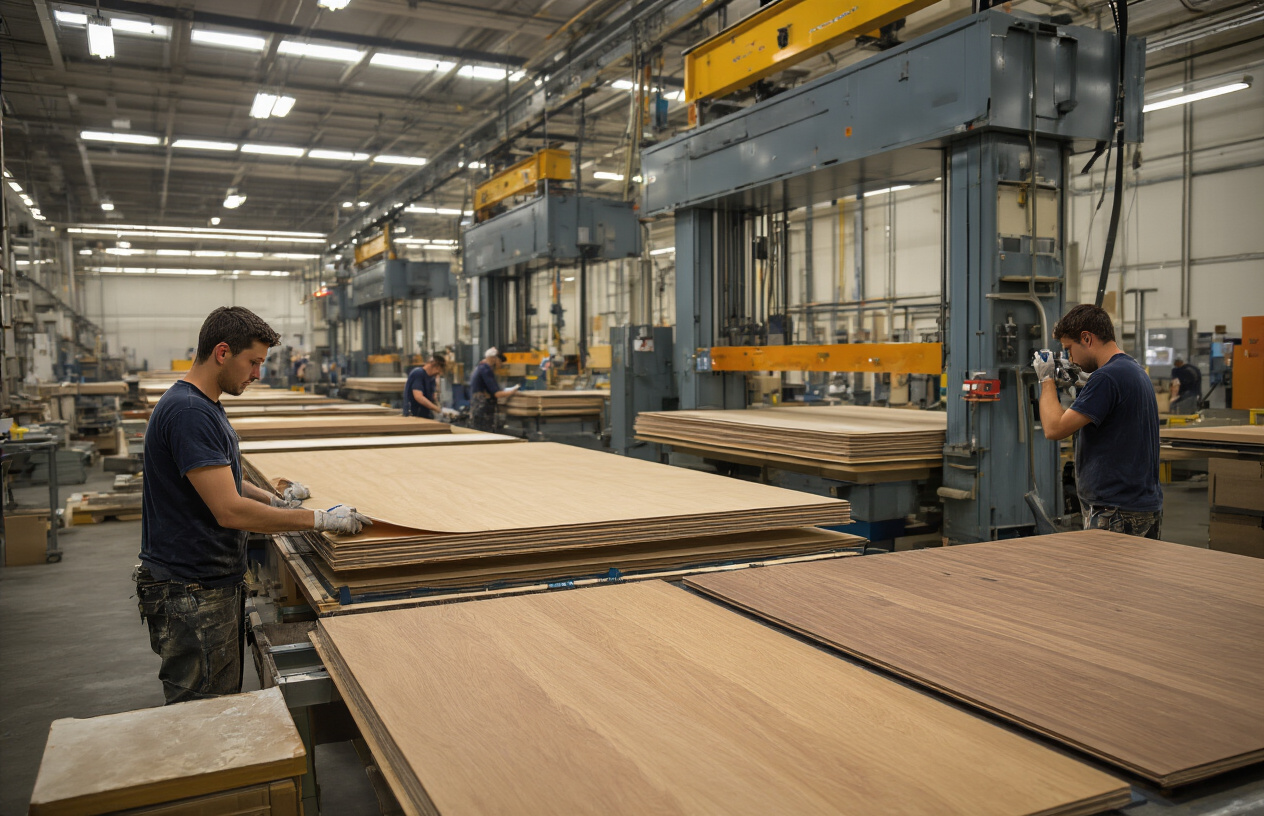
Pressing Techniques and Equipment
Getting that veneer to stick requires the perfect combination of pressure, temperature, and time.
Cold pressing works for simple projects with PVA adhesives. The setup is basic – clamps, cauls, and patience (24+ hours of it).
Hot pressing is the commercial standard, using hydraulic presses that apply uniform pressure (usually 150-200 psi) while heating the adhesive to its curing temperature (typically 220-320°F). The magic happens fast – often in just 1-5 minutes.
Vacuum pressing offers the best of both worlds for custom shops. It uses atmospheric pressure to apply even force across curved or complex surfaces.
The real game-changer? Continuous presses used in large operations. These monsters can process veneer panels non-stop, dramatically increasing output.
Quality Control During Bonding Processes
Quality control isn’t just a final check – it’s built into every step of the bonding process.
Pre-bond testing is crucial. Adhesive mix ratios, open time, and spread rates all need verification before a single panel gets made.
During pressing, monitoring temperature, pressure, and cure time is non-negotiable. Modern presses have sensors that track these parameters in real-time.
After pressing, each panel undergoes inspection for delamination, bubbles, or adhesive bleed-through. The knife test (cutting a small section to examine the bond) and tension tests are industry standards.
The best manufacturers also perform accelerated aging tests – cycling panels through extreme humidity and temperature changes to guarantee long-term performance.
Finishing Touches and Final Products
A. Sanding and Surface Preparation Techniques
Ever watched a craftsman turn a rough veneer panel into something smooth as glass? That’s the magic of proper sanding.
Most manufacturers start with coarse-grit sandpaper (60-80) to remove major imperfections, then gradually work their way up to finer grits (150-220). This progression is crucial – skip a grit and you’ll see those scratches forever.
The pros use wide belt sanders for large panels, moving the veneer through multiple sanding stations in one pass. It’s like an assembly line for smoothness.
Hand sanding still matters for delicate areas and figured woods. Some woods like bird’s eye maple need extra gentle handling to prevent “burning” those beautiful patterns.
Before final finishing, many workshops use a tack cloth to remove every speck of dust. Miss this step and you’ll end up with tiny bumps in your finish that scream “amateur hour.”
B. Applying Protective Finishes for Longevity
The finish makes or breaks a veneer panel. Full stop.
Oil-based polyurethane offers serious protection but yellows over time. Water-based finishes stay clear but don’t have the same depth. Conversion varnishes give commercial-grade durability but require proper ventilation and expertise.
Here’s what the top manufacturers typically use:
| Finish Type | Best For | Application Method |
|---|---|---|
| UV-Cured | High volume production | Roller coating, instant cure |
| Catalyzed Lacquer | Furniture grade | Spray application |
| Natural Oils | Eco-friendly projects | Hand rubbed |
Multiple thin coats always beat one thick coat. Between coats, light sanding with 320-400 grit creates the perfect tooth for adhesion.
C. Edge Treatments and Panel Trimming
Raw edges on veneer panels are like unfinished sentences – they just look wrong.
Edge banding is the go-to solution, available in matching veneer or complementary species. The real craftsmen miter the corners for that seamless look where edges meet.
CNC precision trimming has revolutionized edge work. What used to take hours of careful handwork now happens in minutes with perfect repeatability.
For curved edges, manufacturers use specialized shapers with custom bit profiles. The trick is to move the panel at just the right speed – too slow burns the wood, too fast creates chatter marks.
Edge details make veneer panels sing. A simple chamfer adds shadow lines that highlight the wood’s natural beauty, while bullnose edges create a sophisticated, substantial feel.
D. Packaging and Storage for Distribution
Veneer panels are divas – they demand perfect conditions.
The industry standard is to wrap finished panels in protective foam sheets before placing them in rigid cardboard containers. High-end manufacturers use custom-built wooden crates for overseas shipping.
Humidity control is non-negotiable. Panels are typically wrapped in moisture-resistant packaging with desiccant packets included to maintain optimal 6-8% moisture content.
Stacking matters too. Flat storage prevents warping, with spacers between panels to allow air circulation. The best warehouses maintain temperature between 60-75°F with 35-45% relative humidity.
Just-in-time delivery reduces storage needs, but proper acclimation at the destination is critical. Smart manufacturers include instructions for the receiving party to let panels adjust to local conditions for 72 hours before installation.
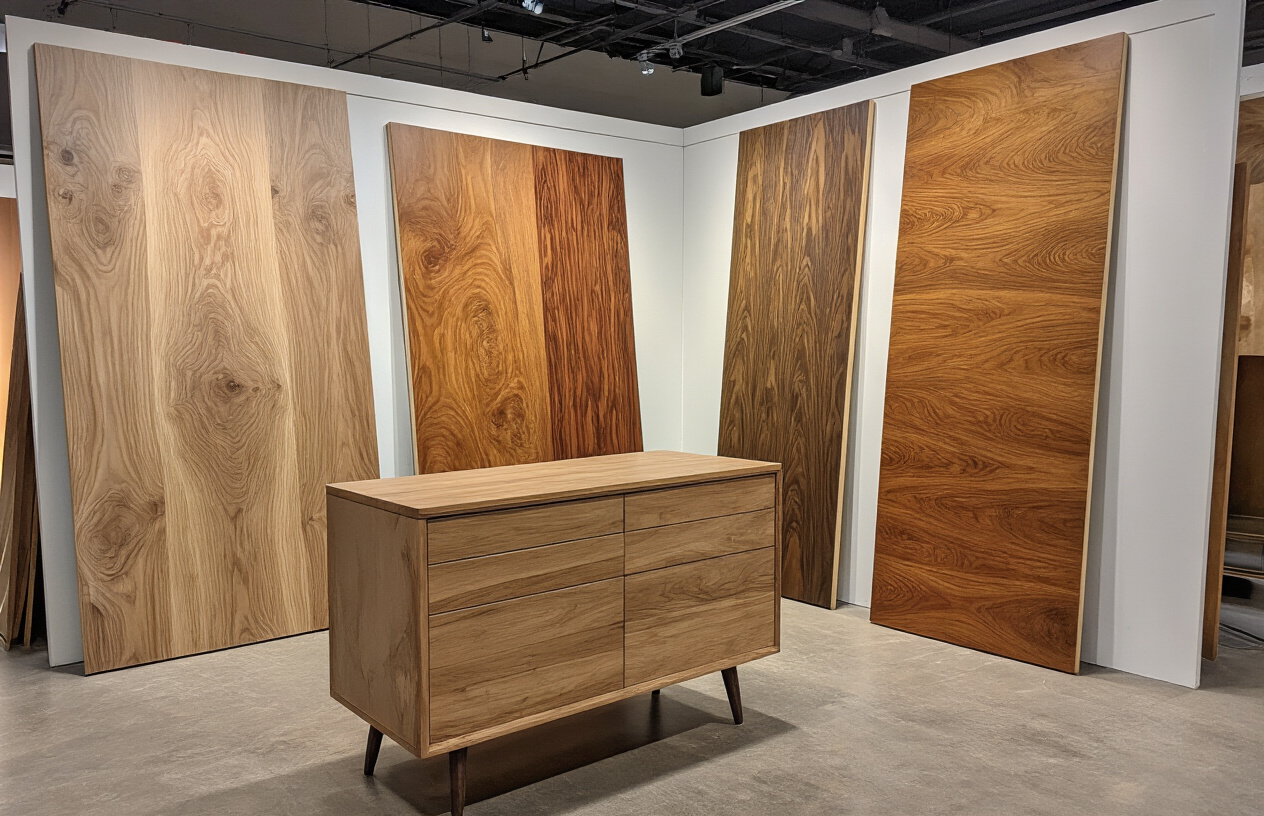
Creating beautiful veneer panels begins with careful selection of trees and continues through specialized processes of cutting, drying, and bonding. Each step requires precision and expertise, from proper log preparation to the delicate art of transforming logs into thin sheets that showcase wood’s natural beauty. The manufacturing journey culminates in finished panels that balance aesthetics with structural integrity.
Whether used in fine furniture, architectural elements, or decorative panels, natural veneer represents both craftsmanship and sustainability. By understanding the comprehensive journey from forest to finished product, we gain appreciation for these remarkable materials that bring warmth and character to our environments while making efficient use of precious timber resources.